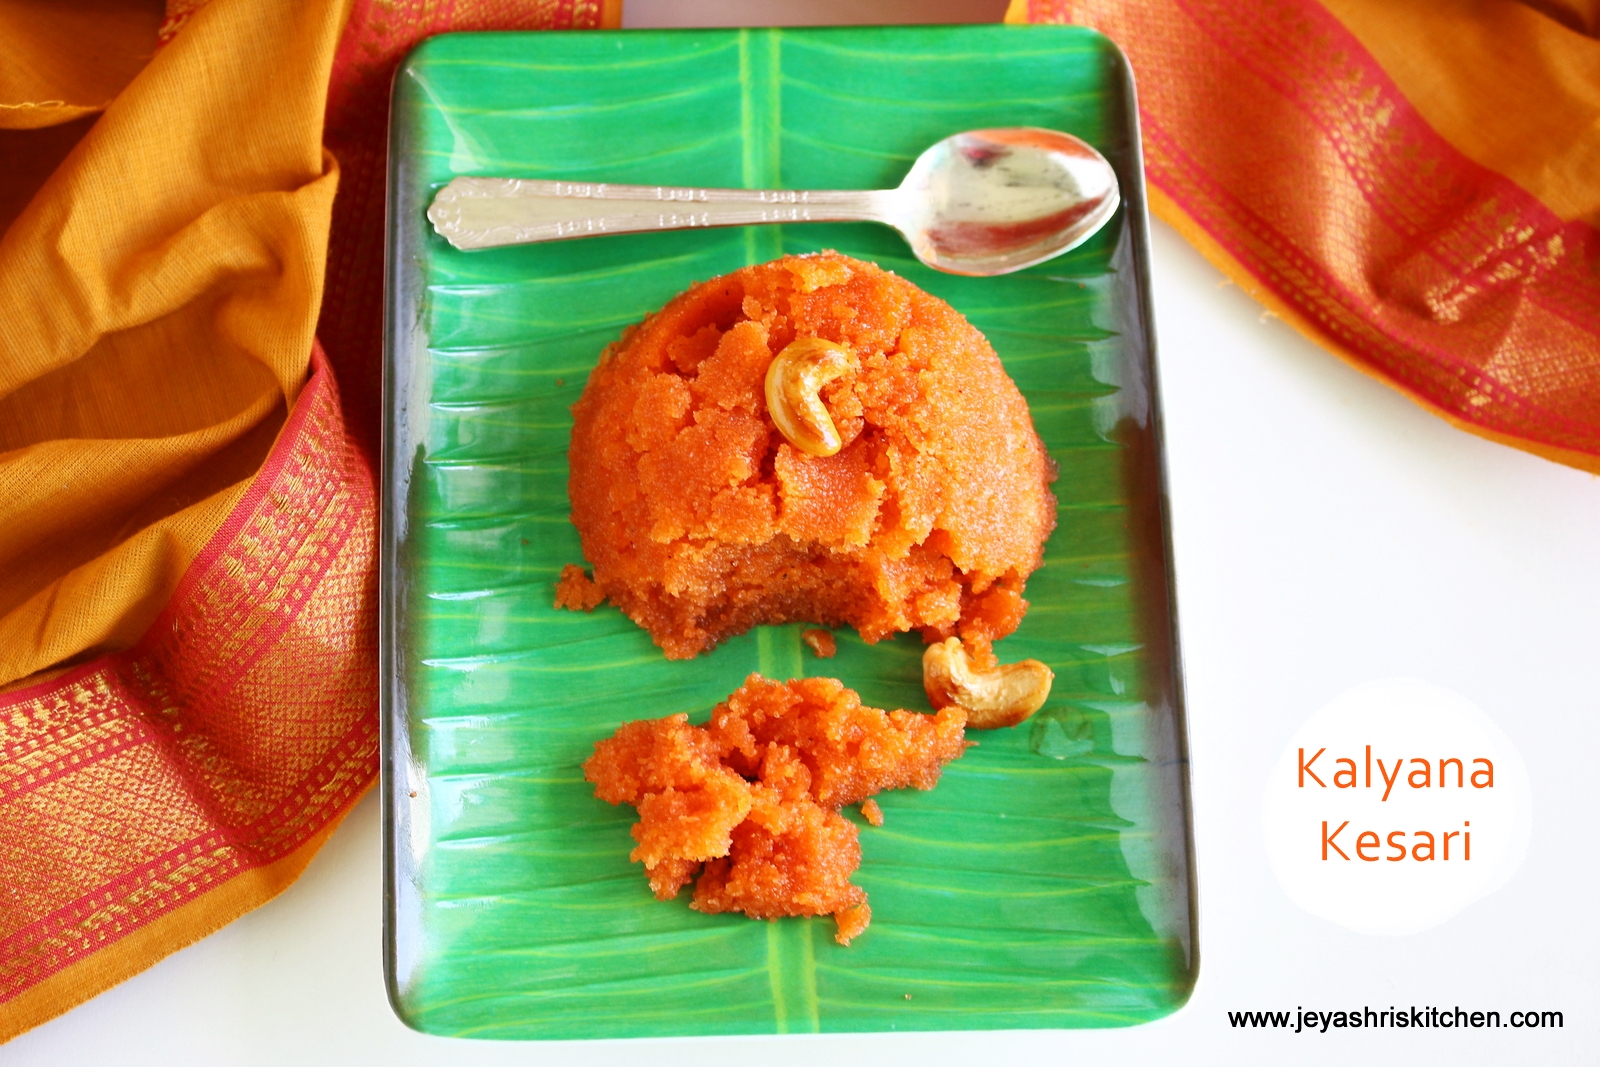
Rava kesari, Kalyana rava kesari , wedding style rava kesari recipe with full video and detailed step by step instructions.
Rava kesari, is one the easiest sweet recipe which is very common in most households. During our childhood days, whenever we have sudden guests at home, amma or paati will make Rava kesari only. I have posted few kesari varieties in Jeyashris kitchen
Though I make good rava kesari, I want to learn the trick of the Rava kesari served in Weddings. If you have observed it well, the kesari stays in the same texture even after many hours.
So what is the secret in making of Kalyana style Rava kesari. This question was lingering in me for many months. I called up my perimma, from whom we learnt Kalayana bonda mor kuzhambu, and asked her about the kesari. My cousin and perimma explained clearly the secrets of the Rava kesari recipe. That’s fantastic learning for me. So I wanted to share what I learned, with you all.
Please do read the full post and then proceed to make the Kalyana Rava kesari. Also check out my semiya kesari, pineapple kesari, mango kesari and Aval kesari.

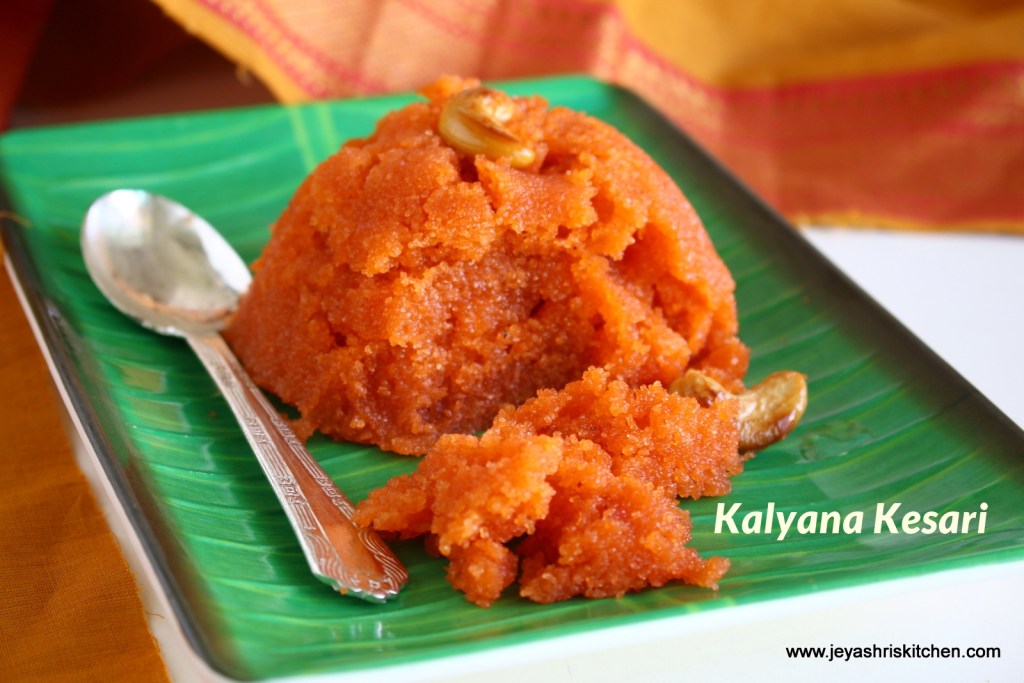
Kalyana Rava Kesari
Ingredients
- 1 cup Sooji | rava
- 3 cups water
- 1 cup Sugar
- 1/2 cup + 1 tbsp ghee
- 1 tbsp oil
- Cashew nuts few
- 1/4 tsp Cardamom powder
- 1/8 tsp Orange food color
Instructions
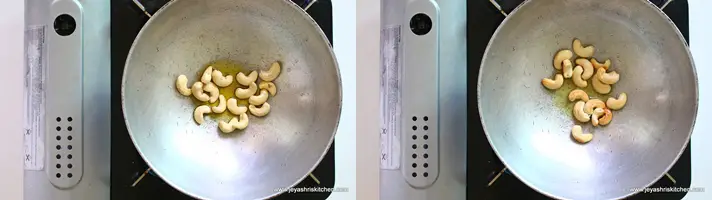
- In a pan add 1 tbsp ghee and fry the cashew nuts.
- Once it is golden brown, take out and keep them aside.
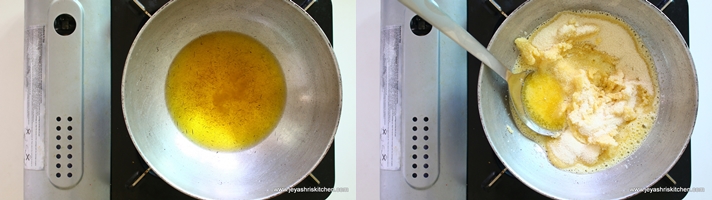
- In the same pan add 1/2 cup ghee.
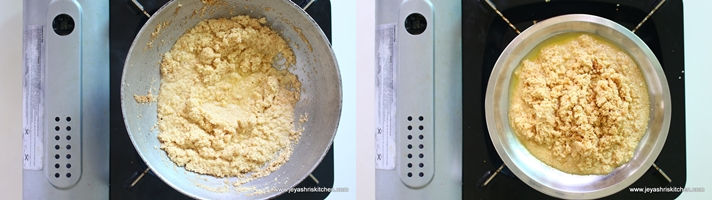
- Fry the rava in the ghee. We are adding all the ghee while frying the rava. (in Tamil porichu edukavum)
- This is the first secret in making the Kalyana kesari.
- Roasting part is the key, this will give a perfect texture to the rava kesari.
- Roast in a medium flame till it gets nicely fried in ghee.
- Even the color can slightly change, but ensure it should be well roasted.
- Even if you are using roasted rava, this frying past is a must.
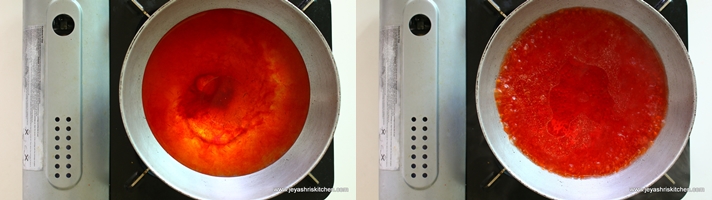
- Boil 3 cups of water in a saucepan.
- Add the food color, a pinch of salt to this, and add 1 tbsp of oil.
- Do not add more oil than this. Oil gives softness to the kesari. This is the second secret of the Kalyana kesari.
- Salt enhances the taste of sweet, so do not omit it.
- Adding food color is optional, since I make kesari once in a year I prefer it to be in Orange color.
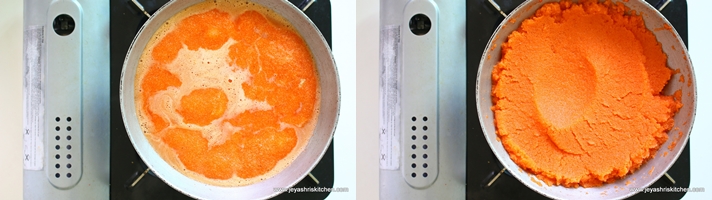
- Once the water starts boiling, add the roasted rava to this.
- Always keep the flame low while adding the water to the rava.
- Stir well continuously and ensure no lumps are formed.
- Since we roasted rava nicely, lumps will not be formed.
- Once the rava starts absorbing water, cover the pan and cook on a low flame.
- Let this become completely dry and non-sticky.
- The rava should be cooked well, else kesari will not turn out well.
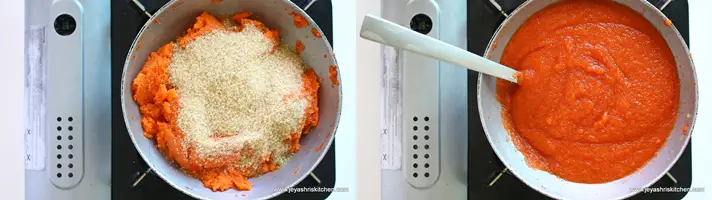
- Once it is cooked well and the water gets absorbed, add the sugar. I added 1 cup sugar, you can add little more too. But do not reduce.
- After adding sugar, the mixture will be runny. Don’t panic. It will be fine in a few minutes.
- Stir well till it becomes thick.
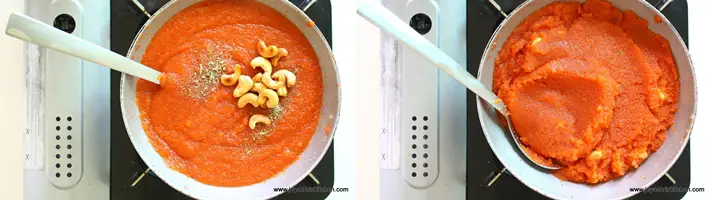
- Once the right consistency is reached, add the cardamom powder and ghee fried cashew nuts.
- Mix well and cook for 3-4 mins.
- Switch off the flame.
- Rava kesari is ready.
- This kesari retains the same texture for many hours.
Video
Notes
- Roasting the rava is the key part, so don’t miss that. 2. Ensure the rava is cooked well before adding the sugar. 3. Rava kesari can be spread in a ghee smeared plate and cut into pieces before serving.
- In a pan add 1 tbsp ghee and fry the cashew nuts.
- Once it is golden brown, take out and keep them aside.
- In the same pan add 1/2 cup ghee.
- Fry the rava in the ghee. We are adding all the ghee while frying the rava.(in Tamil porichu edukavum)
- This is the first secret in making the Kalyana kesari.
- The roasting part is the key, this will give a perfect texture to the rava kesari.
- Roast in a medium flame till it gets nicely fried in ghee.
- Even the color can slightly change, but ensure it should be well roasted.
- Even if you are using roasted rava, this frying past is a must.
- Boil 3 cups of water in a saucepan.
- Add the food color, a pinch of salt to this, and add 1 tbsp of oil.
- Do not add more oil than this. Oil gives softness to the kesari. This is the second secret of the Kalyana kesari.
- Salt enhances the taste of sweet, so do not omit it.
- Adding food color is optional since I make kesari once in a year I prefer it to be in Orange color.
- Once the water starts boiling, add the roasted rava to this.
- Always keep the flame low while adding the water to the rava.
- Stir well continuously and ensure no lumps are formed.
- Since we roasted rava nicely, lumps will not be formed.
- Once the rava starts absorbing water, cover the pan and cook on a low flame for a minute.
- Let this become completely dry and non-sticky.
- The rava should be cooked well, else kesari will not turn out well.

- Once it is cooked well and the water gets absorbed, add the sugar. I added 1 cup sugar, you can add little more too. But do not reduce.
- After adding sugar, the mixture will be runny. Don’t panic. It will be fine in a few minutes.
- Stir well till it becomes thick.
- Once the right consistency is reached, add the cardamom powder and ghee fried cashew nuts.
- Mix well and cook for 3-4 minutes.
- Switch off the flame.
- Rava kesari is ready.
- See the pan, I have transferred the kesari from the pan. It didn’t stick to the pan.

- This kesari retains the same texture for many hours.


Cane out very well when I tried today, thank you